At Markstone Landscaping, we are going to show you how installing concrete driveway, patio or walkway is essentially the same process. By helping you understand the process and become better informed (e.g. transparency), you can be more comfortable in hiring us or referring us to your friends and family.
The process in pouring concrete for a driveway is the same for walkways, stairs and backyard patios. However, the challenges facing each project type is different because the various variables such as the size, shape, finish and depth of the concrete are different for each project and that affects the amount of materials, pricing and schedule.
Here is a general guideline of what takes place before, during, and after the concrete is installed.
Before Concrete Installation
Before work begins, a clear understanding of the task at hand needs to be communicated through the contract. This is what the contract contains:
- Statement of work to be completed
- Expectations
- Price
- Texture
- Color
- Finish
- Payment schedule
- Work schedule
- Warranty information
- Drawings (if any)
- Contact details of both parties
After the contract has been signed, the site work can begin with preparation of the concrete installation area and should include some, if not all of the following:
- Clear and/or clean installation area (e.g. grass, rocks, trees, shurbs, construction waste and even old concrete) to expose the dirt
- Installation of a sub base foundation in preparation of the concrete
- The sub base needs to be compacted over the entire area where the concrete will be installed
By preparing the sub base properly, the chance of the concrete curing properly increases and the chance of heaving is minimized.
Concrete Installation
Before pouring the concrete, forms are required to help give shape to concrete. The forms are built as close as possible to the sketch or diagram provided in the contract. Click to view a visual illustration of how we install a concrete backyard patio.
Although, concrete forms can be made from many types of materials which can include wood, metal, and plastic and range in height from a minimum of 4 inches to many feet (dependent on the project), most, if not all simple concrete projects use wood forms and are held in place with wooden stakes (e.g. sidewalks).
By attaching stakes to the wooden forms with the use of screws or nails, it makes it easy to remove the forms and reuse them again at a later date for another project after the concrete has cured. We always make sure that the wooden forms we use are in good condition so that a proper slope can be created for proper drainage and form clean corners to create a seamless structure. By reusing wooden forms, it also helps keep costs down.
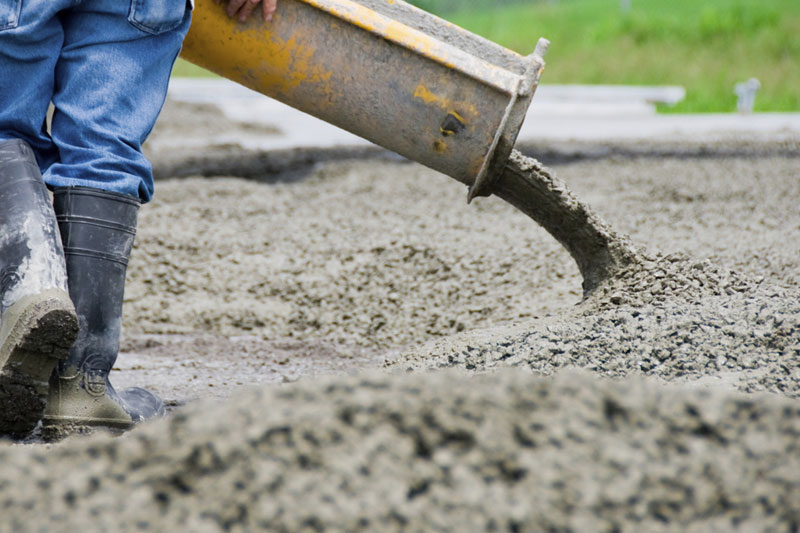
When the sub base is compacted and the forms are set, it’s time for the concrete to be poured in. For all outdoor projects, we always order concrete with a 32 MPA to ensure that we comply with the Ontario Building Code.
The ready-mix concrete typically arrives in a large drum held in the back of a truck where it is spinning slowly to keep the concrete from settling and getting hard. If the installation is close enough to the concrete truck, the concrete will pour directly into the forms. If the installation is far from the truck, wheelbarrows are used to transport the concrete to its final destination.
As the wet concrete fills the forms, we ensure that they are full to the top edge. During the pouring process, we will be using shovels, rakes and “come alongs” (special concrete rake) to move the concrete to make sure there are no voids or air pockets.
After Concrete Installation
Once the concrete has settled into place within the forms, the process to begin finishing the concrete starts. By using specialized equipment such has a trowels, we can ensure that the surface is compacted even further and smoothing out depressions or high areas to create a smooth surface.
As per the contract, you may also elect to have the concrete have a specific type of texture. At Markstone Landscaping, we offer four type of concrete finishes including brushed concrete, exposed aggregate concrete, stamped concrete and limestone-finished modern concrete.
When the placement and finishing is complete, the concrete can begin the process of curing (get hard). The curing process lasts 28 days, with the first 48 hours being the most critical. You can start to use your concrete for light foot traffic 3 to 4 days after placement, and you can drive and park on your concrete 5 to 7 days after placement.
Although concrete is a highly durable product, a properly placed, finished and cured product should last a lifetime. Even though concrete is often considered as a zero maintenance product, following simple maintenance procedures can increase the service life of your concrete considerably such as using a good quality sealer and occasionally cleaning with soap and water.
For more information on concrete and concrete installation, read our article “What You Should Know About Concrete and Concrete Installation”. To learn the pros & cons of concrete driveways, click here.

